How to Make Faux Leather From Brown Paper for Art Work
Imitation Leather Technique for Paper
Hey there! It'southward Heather from Thicketworks…here with an awesome Faux Leather Technique. The basics of this technique accept been around for awhile, but I have a twist I'd like to share with you.
This postal service may contain affiliate links which won't modify your price but volition share some commission, you lot tin find our privacy policy here.
{This post contains affiliate links}
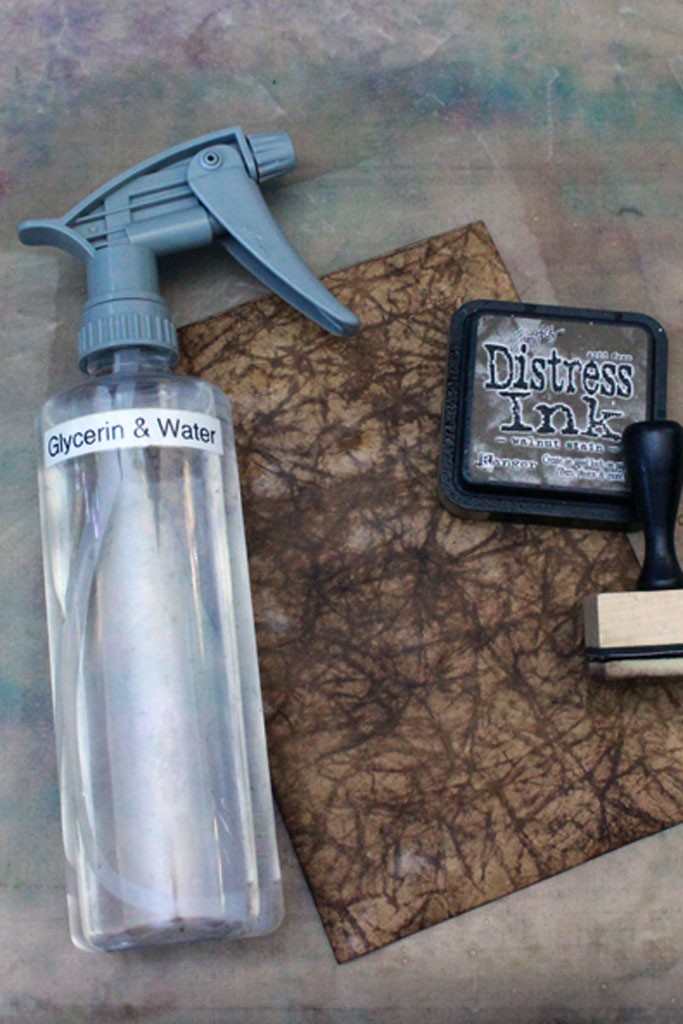
Supplies for the Faux Leather Technique for Newspaper
To achieve this await, you'll demand the following:
- Kraft cardstock (I use Recollections eight one/2″ 10 11″ 65lb Kraft Cardstock from Michael's)
- Glycerin from the drug shop
- Spray bottle of h2o (I add some Glycerin to mine)
- One-time souvenir carte du jour or similar
- A Not-Stick Arts and crafts Sheet by Ranger, or similar impervious surface
- An atomic number 26
- Tim Holtz Distress Ink Pads. The colors used in this project are:
- Brown Leather Await: Vintage Photo
- Red Leather Look: Walnut Stain & Anile Mahogany
- Green Leather Await: Mowed Backyard & Salty Ocean
- A Ranger Inkssentials Ink Blending Tool, and 3 Blending Foam Pads
- Embossing Folder: Cricut Cuttlebug Damask Brocade
- Red Leather Await: Inka Golden – Erstwhile Gilt
- Green Leather Look: Inka Gold – GreenYellow
- Brown Leather Wait: Inka Gold – Orange
- Optional: Rustoleum Ultra Cover Gloss Clear
Technique:
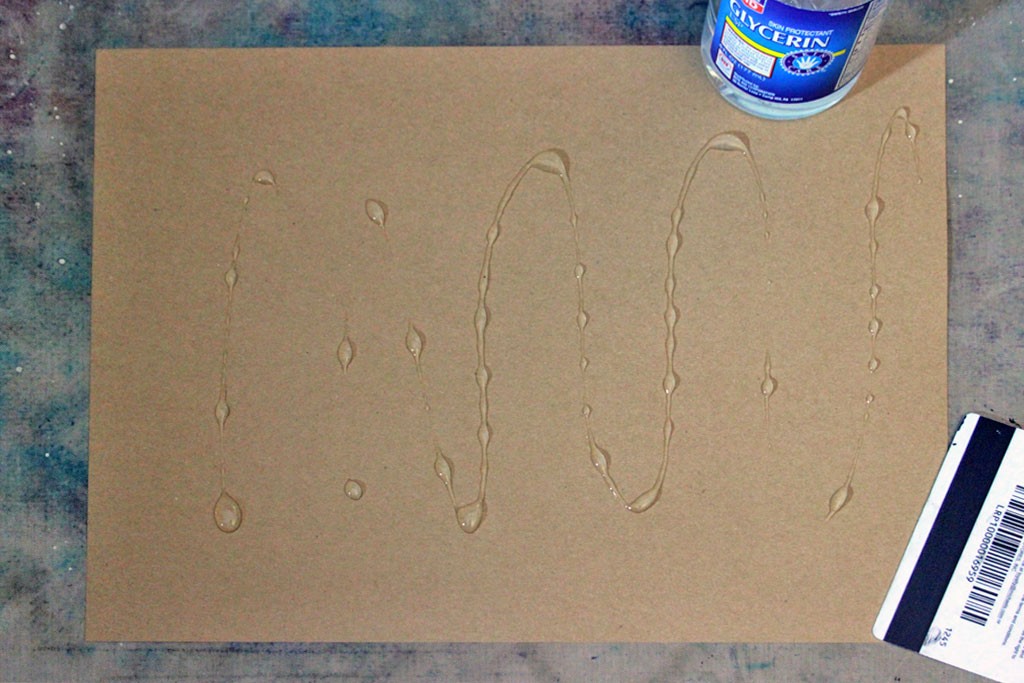
- The first step is to dampen your cardstock with water
(I just use a spray canteen) - Pour a generous amount of Glycerin onto the surface of the damp paper
- Swipe the Glycerin beyond the surface with your gift-card, making certain the entire surface is coated.
- Echo these steps on the other side of the paper
5. Once the paper is thoroughly coated with Glycerin on both sides, carefully begin to crinkle it upwards.
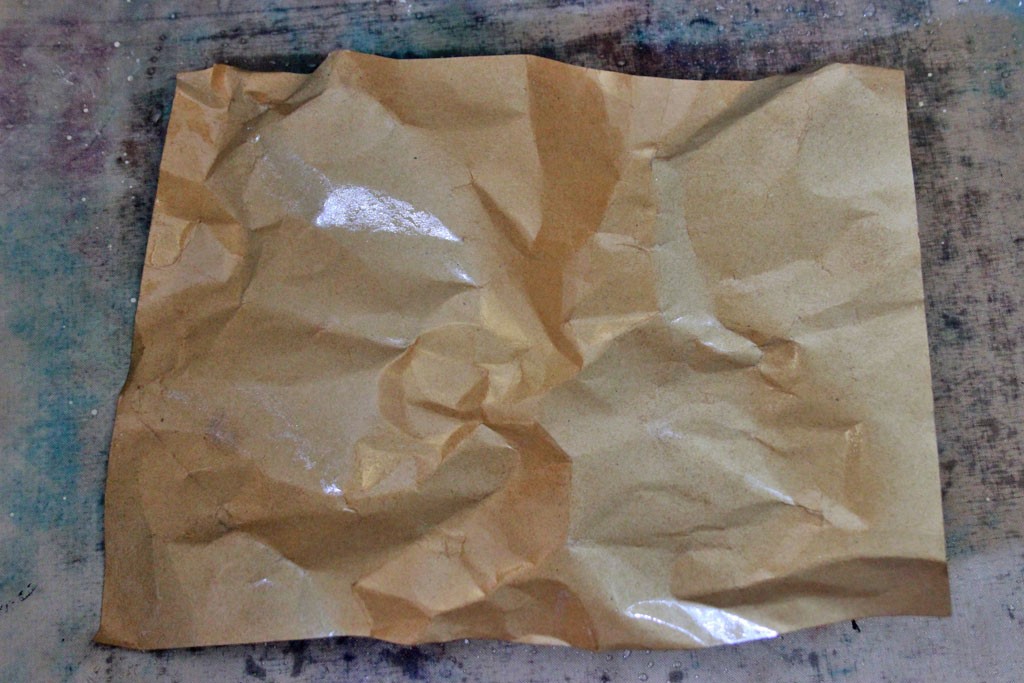
6. When it feels fairly flexible, gently wad it up into a ball.

7. Echo this process of wadding up, and so gently smoothing out the paper several times, until the creasing looks something like this:
8. When you lot're satisfied that you've abused the poor thing plenty, smoothen it out ane more than time, and gently fold it in half, creating a 5 1/ii" ten 8 1/ii" 'card'.
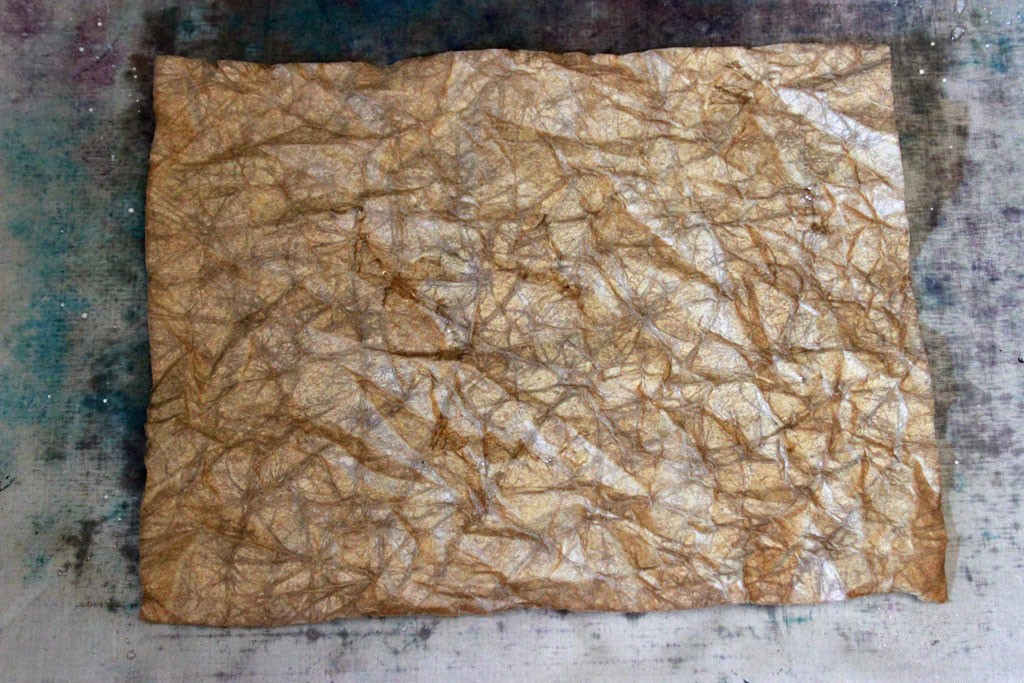
9. With your iron set to 'no steam', and on the 'Wool' setting, press the folded paper repeatedly until it's dry out and as smooth as it's always gonna become later all our crinkling…(when your iron cools down, make sure to wipe the surface with your favorite cleanser, or await weird stains to appear when yous iron the adjacent time)
ten. Now we'll add some depth with Distress Inks. Load up your Blending Tool with ink and swirl information technology all over the surface of the paper.
11. It will gather in the creases and you may think that it looks style too dark – don't be alarmed. As the ink dries it will lighten in tone. If yous all the same don't like it, yous can soften the look by spraying information technology with a low-cal mist of water.
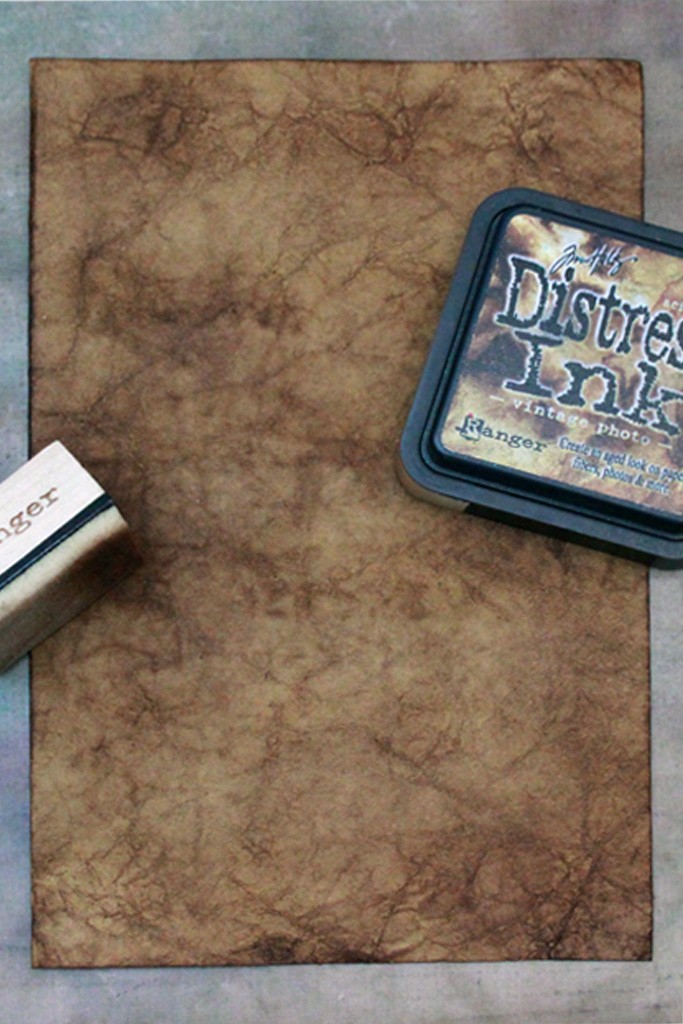
For a classic Brown Leather expect, try using Vintage Photo:
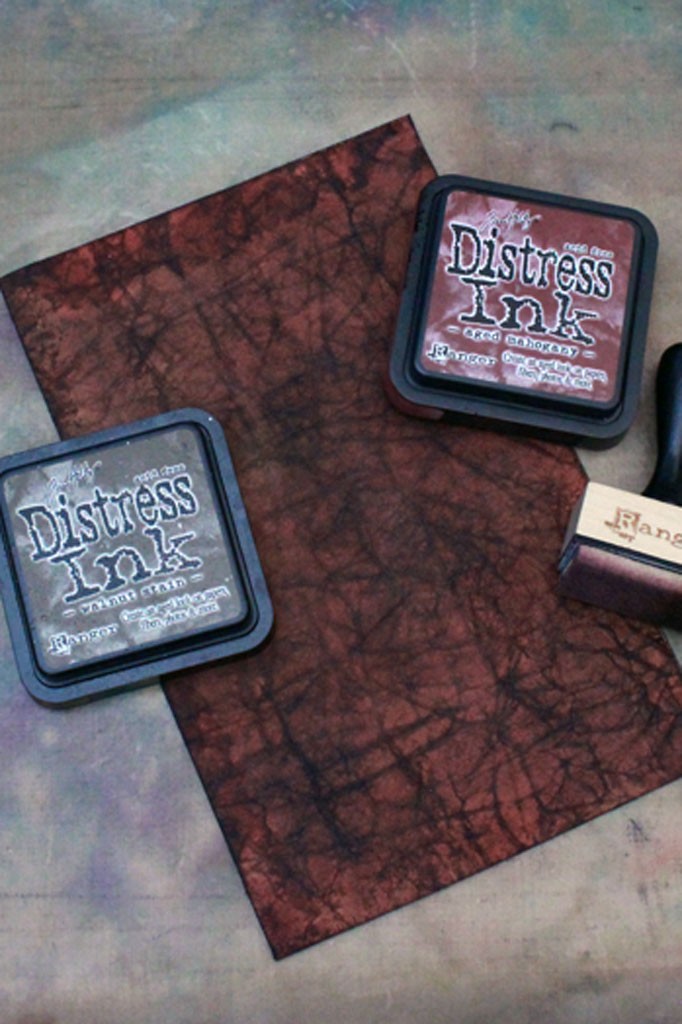
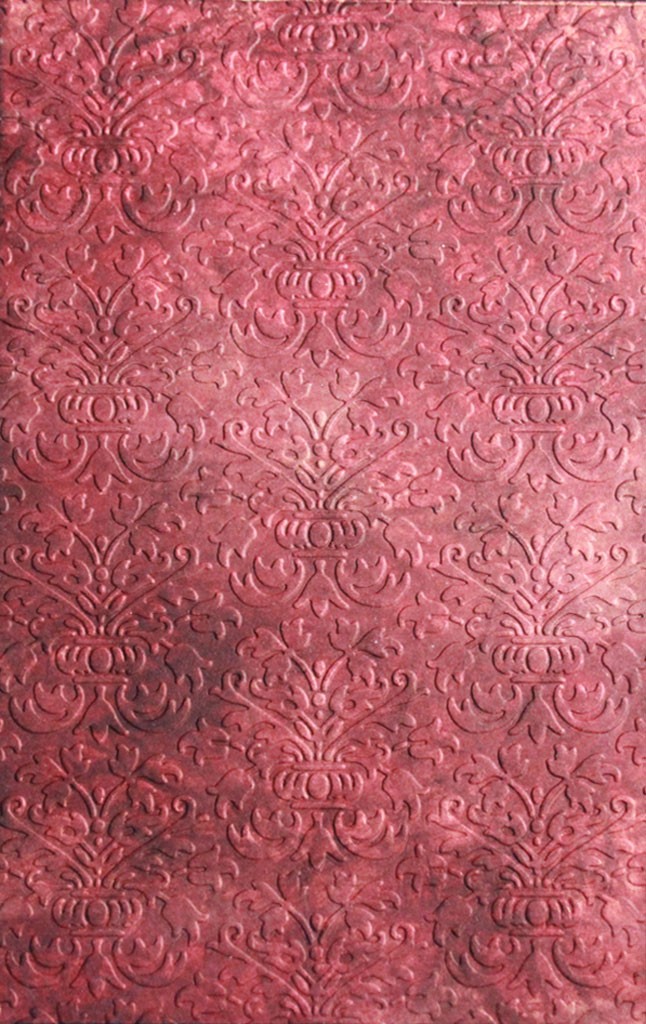
If you'd like to attempt the Red Leather Look, begin past swirling Walnut Stain Distress Ink over the entire surface of the crinkled Kraft, then follow it with Aged Mahogany.
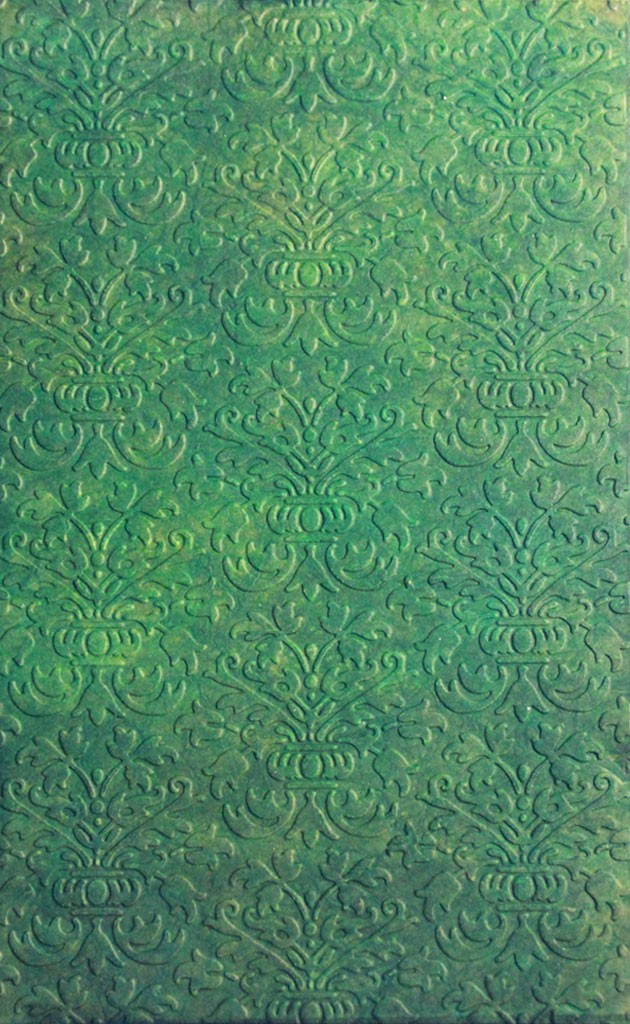
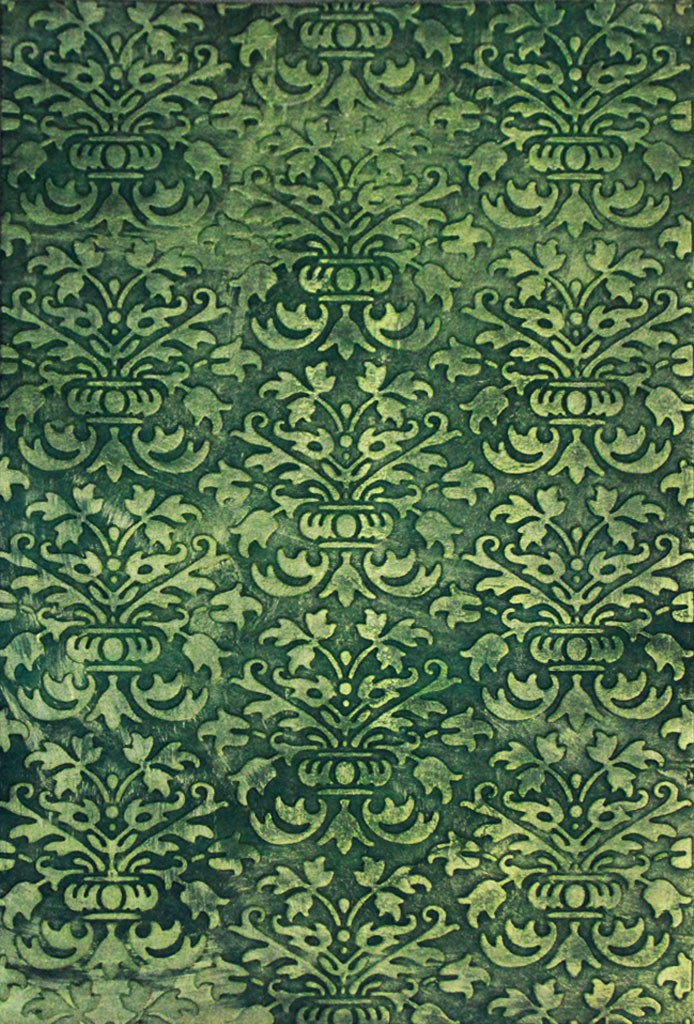
For the Greenish Leather Look, begin with Mowed Lawn Distress Ink, followed past Salty Sea.

12. Iron your inked-up papers until they are almost, just not quite dry. Notation: The paper volition be 'limp' even when dry, due to the consequence of the Glycerin. I can think of a ton of ways to use the Faux Leather, fifty-fifty without further tampering. Merely…if it'due south possible to tamper, tamper I volition. If you feel similar tampering – read on:
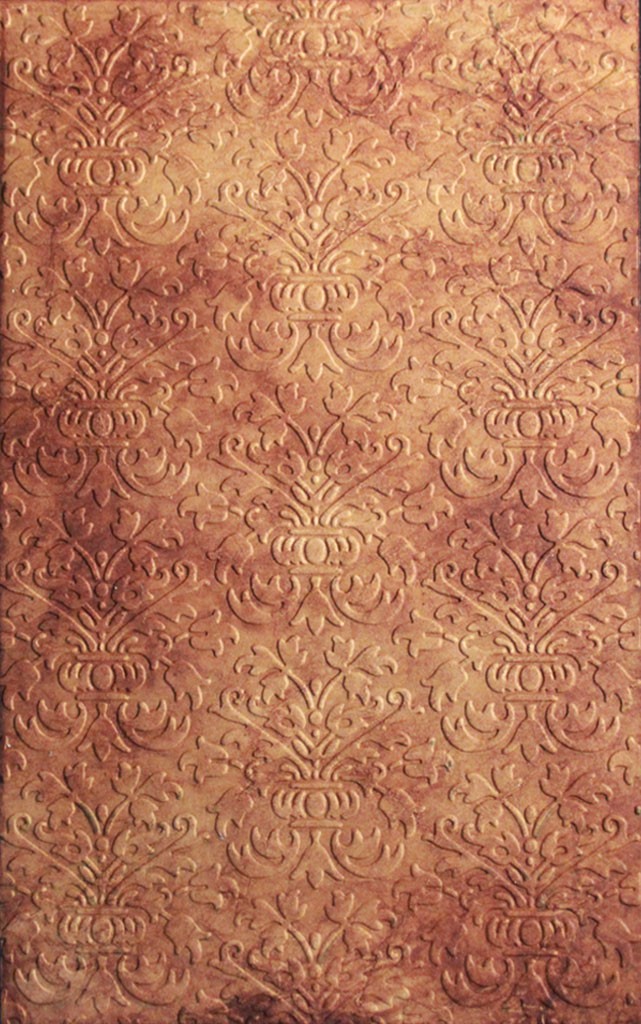
13. Place your folded newspaper into your favorite embossing binder, and crank it through your favorite die cut machine. (I used the Damask Brocade embossing folder by Cuttlebug, and a Sizzix / Vintaj Large Kick).
Note: Betwixt each embossing process, it's a skillful idea to wipe the interior of your embossing folder to remove any ink or wet that transferred to it during the embossing process.
Here are examples of the glycerin soaked, crumpled, ironed, inked and embossed cardstock:
Vintage Photograph Distress Ink + Damask Brocade pattern
Walnut Stain Distress Ink + Anile Mahogany
+ Damask Brocade design
Mowed Lawn Distress Ink + Salty Ocean
+ Damask Brocade design
If you're a 'also much is never enough' kind of person, then yous'll understand that I found it necessary to add together another layer of richness to all this lovely embossed 'leather'.
If you're more reasonable in your outlook, and then I green-eyed your restraint – yous can just skip over the side by side section…
I loved the await and feel of the project so far – the depth of the colors, the classic pattern of the embossing. However, if it's worth doing, it's worth finding a style to add Inka Gilt to it. And so I did. The twist to this projection? Yep, here it is:
Because I didn't want a slap-nuance application of the metallic sheen, I decided to re-purpose my Blending Tool.
This is a little secret that has helped me many times. When yous but want to add colour to the raised portion of an embossed surface, using your fingertips tin can be a really bad choice.
Generally, the color will go into the crevices of the design and crusade a less than pristine outcome. I'g okay with that most of the time. In fact, messiness is my forte.
Just for this project I wanted more control – the Blending Tool is platonic for this job.
I like to dig out a pocket-sized dab of the Inka Gold and smear information technology on my Non-Stick Craft Mat. Then I spritz it with a bit of water, and blend until there'south a smooth and thin layer.
14. Drag the blending tool over the gold mixture, and so carefully smooth the blending pad along the surface of the embossing. This will transfer the gold only to the raised portions.
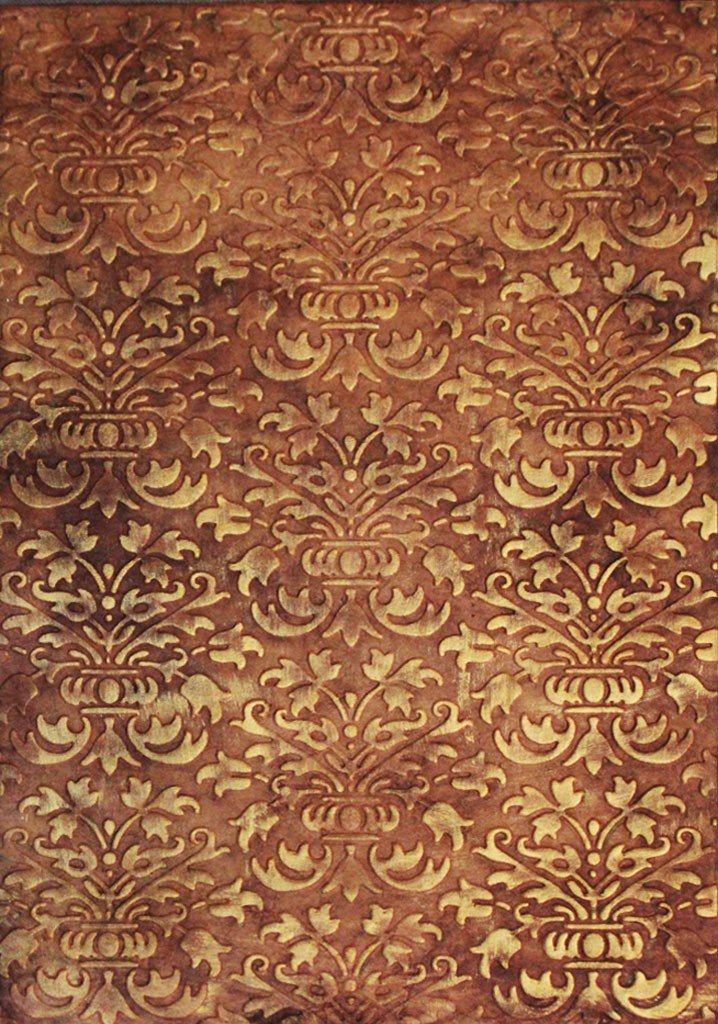
For the Brown Leather Await, I chose Inka Gilded in Orange.
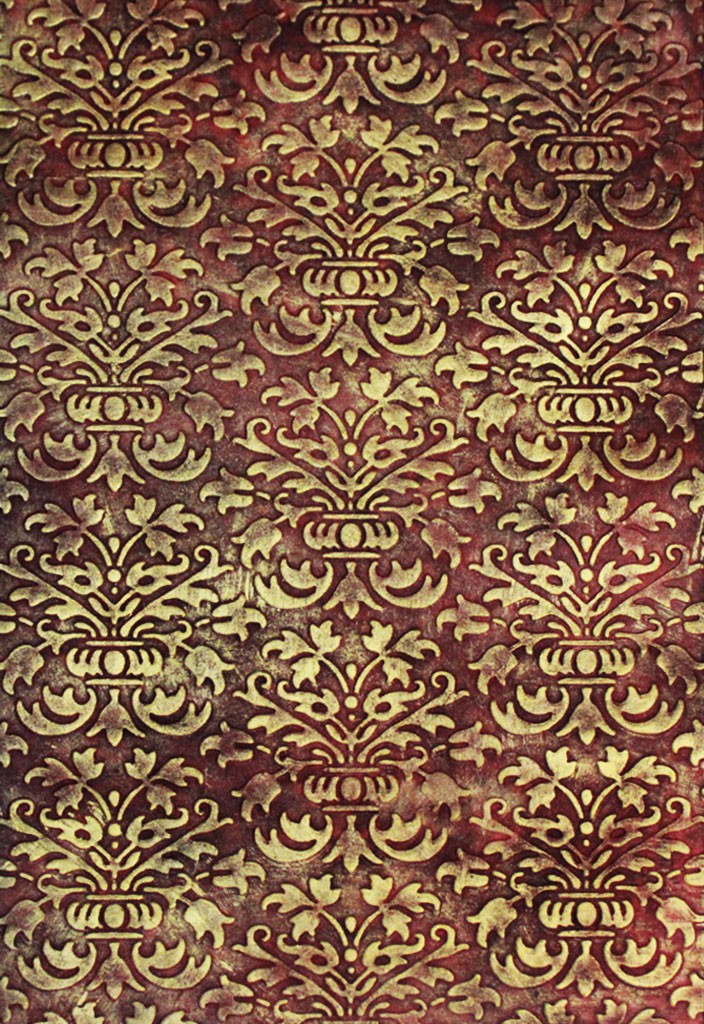
For the Red Leather Look, try Inka Gold in Quondam Aureate.
For the Light-green Leather Look, Inka Gold in Green/Yellow adds simply the right touch.
fifteen. Once the Faux Leather has dried thoroughly, seal with your favorite summit-coat. Keep in mind that Inka Gilded and Distress Inks are water soluble, and so calculation a top-coat with a brush may ruin the metal consequence. To seal these beauties, I chose Rustoleum Ultra Comprehend Gloss Articulate spray, which I pick up at Dwelling Depot.
Well, at that place you get – Faux Leather, suitable for book covers or whatever your feverish imagination tin can conjure!
Thank you for joining me for this little jaunt! If you lot enjoyed this technique, stop by Thicketworks some time and join in the mayhem.
Take Care,
Heather
Are you lot interested in learning more fabulous Techniques from Heather Tracy? We have an amazing Mixed Media Video Course in the works! You can learn more virtually it, and sign up to receive updates, HERE.
Source: https://thegraphicsfairy.com/faux-leather-technique-for-paper/
0 Response to "How to Make Faux Leather From Brown Paper for Art Work"
Post a Comment